Using Client Credentials
Requirements
As explained in the Authentication page, you will need to request a set of Client Credentials from an authorized reseller. Once you have the Client ID, Client Secret, and API Key you can start building.
Getting an Access Token
To get an Access Token, perform a
https://auth.weightron.cloud/oidc/token providing the grant_type,
client_id, and client_secret in the body. A scope can also be provided if necessary.
An API Key is not required for the token request.
- ✉️ Postman
- 🧀 JavaScript
- 📄 Excel Power Query
When using Postman, set the body type to x-www-form-urlencoded and add each key required and its value.
Under the Authorization tab select No Auth.
Under the Authorization tab, you can select OAuth 2.0 and enter your credentials under Create New Token.
Variables are used in the example below to hide the ID and Secret values.

All code examples on this page are for demonstration purposes and support will not be provided.
async function getAccessToken() {
    const clientId = "<YOUR_CLIENT_ID>";
    const clientSecret = "<YOUR_CLIENT_SECRET>";

    let req = await fetch("https://auth.weightron.cloud/oidc/token", {
        method: "POST",
        body: `grant_type=client_credentials&client_id=${clientId}&client_secret=${clientSecret}`,
        headers: {
            "Content-Type": "application/x-www-form-urlencoded",
            "Cache-Control": "no-cache",
        },
        mode: "cors",
    });

    if (!req.ok) throw new Error("Error getting access token: " + req.status + " (" + req.statusText + ")");

    return await req.json();
}
The above example includes basic error handling. See Error Responses for more info on handling errors.
All code examples on this page are for demonstration purposes and support will not be provided.
let
  AuthURL = "https://auth.weightron.cloud/",
  TokenEndpoint = "oidc/token",
  ClientID = "<YOUR_CLIENT_ID>",
  ClientSecret = "<YOUR_CLIENT_SECRET>",

  TokenQueryBody = "grant_type=client_credentials&client_id="&ClientID&"&client_secret="&ClientSecret,

  TokenObj = Json.Document(Web.Contents(AuthURL,
      [
          RelativePath = TokenEndpoint,
          Headers = [
              #"Content-Type"="application/x-www-form-urlencoded"
          ],
          Content=Text.ToBinary(TokenQueryBody)
      ]
  )),

  Token = TokenObj[access_token],

  ...
A JSON response is returned containing the Access Token and the number of seconds until token expiry.
{
    "access_token": "<ACCESS_TOKEN>",
    "expires_in": 300,
    "token_type": "Bearer"
}
Checking Access
This step is not required during normal operation, however it can be used for testing the API Key and Access Token.
Perform a
https://api.weightron.cloud/access to check what application/s the provided credentials
have access to. The Authorization and x-api-key headers are required for all request to the API.
The Authorization header containing the bearer access token from the previous step Authorization: Bearer ..., and the x-api-key
containing the API Key value supplied by your authorized reseller.
- ✉️ Postman
- 🧀 JavaScript
Under the Headers tab, add a key for x-api-key and add the value required.
Under the Authorization tab select Bearer Token and enter the Access Token from the previous step.
Variables are used in the example below to hide the ID and Secret values. 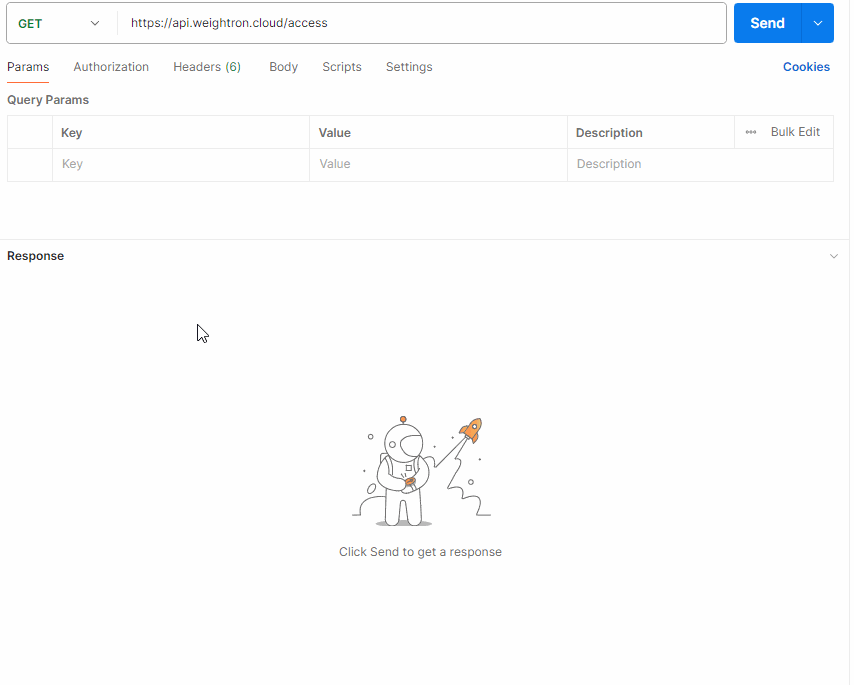
All code examples on this page are for demonstration purposes and support will not be provided.
async function getAccess(accessToken) {
    const apiKey = "<API_KEY>";

    let req = await fetch("https://api.weightron.cloud/access", {
        method: "GET",
        headers: {
            Authorization: `Bearer ${accessToken}`,
            "x-api-key": apiKey,
        },
        mode: "cors",
    });

    if (!req.ok) throw new Error("Error getting access: " + req.status + " (" + req.statusText + ")");

    return await req.json();
}
All API responses are returned in a JSON format containing an Object with a timestamp and data key. See
Response Format for more info.
{
    "timestamp": "2024-09-20T15:06:20.323Z",
    "data": [
        {
            "_id": "66840a91a752c27bf3c886f2",
            "name": "Documentation Example",
            "expiry": "2030-09-20T22:59:59.999Z",
            "company": {...}
        }
    ]
}
In this case the /access endpoint returns an array of Application objects the OIDC client has access to. The _id of the object is the
value to be used for future API requests when an ApplicationID is required.
Using the above response you could get a list of Collections within the Application by sending a request to:
Convenience with Postman
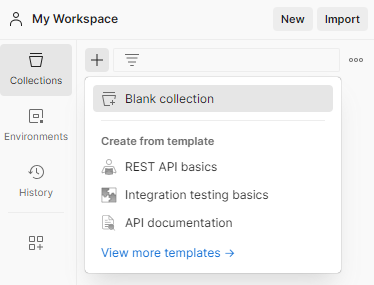
When using Postman it is possible to configure an entire collection to use the same authorization rules. Start by creatng a new collection to save your queries into. Click the + button and select Blank Collection.
In the right pane, click the Authorization tab and set the Auth Type to OAuth 2.0.

Then enter the following details into the Configure New Token section:
| Field | Value |
|---|---|
| Token Name | Any value. |
| Grant Type | Client Credentials |
| Access Token URL | https://auth.weightron.cloud/oidc/token |
| Client ID | Client ID Value supplied by your authorized reseller. |
| Client Secret | Client Secret Value supplied by your authorized reseller. |
| Scope | Space-seperated list of scopes. For Client Credentials offline_access is the only accepted optional value. openid is required for all requests. |
| Client Authentication | Send as Basic Auth Header |
Once configured click the Get New Access Token button at the bottom of the right pane. A modal will appear while Postman runs the authorization query, a message should appear with Authentication complete. A list of tokens will follow after some time, click Use Token in the top right of the modal. All requests made will now use the selected token.
Refresh Tokens
If the offline_access scope has been provided in the token request a Refresh button will be available under the Current Token section
in the collection Authorization pane. Clicking this will refresh the token and assign it for use going forward. Tokens are only valid for 5
minutes so this process may need to be repeated multiple times during your time building the integration.